Wednesday, May 21, 2014

Succulent Propagation Struggling Outdoors

So I realize that taking brand new baby succulents, that don't even have roots yet, and sticking them in new soil, thrusting them out into a wilderness mix of more intense sunlight and more extreme temperatures is probably a terrible idea.  But I tried it anyway.  I wanted a companion piece to my hanging basket and since my door faces south, I figured it would be some great light for the succulents.  Well, the temperature is still dipping down pretty low in these late May weeks.  And it is starting to show on my plants.  So tonight I decided I would start bringing the pots in at night.  I walk right past them going in and out of my house, this should be a task I will remember to do.

May 2014, brought the plants inside:


Hard to see in the below image, but the sedum leaves have dark brown splotches on them.  Such significant contrasting color change in such a short period of time can never be a good sign.


I think I will keep these little propagation pots inside on the window sill with the terrariums.  I slipped plastic sleeves into the saucers to prevent the overflow from further damaging the wood window sill.


Conversely, the "terrarium" propagations look like they are handling their new location, a west-facing window just inside my front door.


Monday, May 19, 2014

Kalanchoe

I first bought this plant from Frederick's Flowers back in September 2013.  It was in bloom already so I'm not sure how long the bloom typically lasts.  I believe blooms started to fall off in the winter time.  It didn't really get totally bare until a couple months ago.  In some recent research, you are supposed to cut the flower stems back after the blooms fall off, to promote new blooms in the next season.  I think I am in the blooming season now because some blooms are starting up again.

September 2013:


April 2014:


After my recent post about propagating some succulents, I remembered that this rascal was a succulent and, shoot, it's grown so much new foliage over the past few months, why not try ripping some of that off - excuse me, pruning it back - and using the clippings as potential propagations.  The first thing I did was to remove undesirable leaves.  In the photo below you can see I have cut off or pulled off the oldest leaves at the bottom, most of which had started to turn crispy brown at the tips.  I'm not sure why they turned brown like that, but that's a mystery for another post.  Another thing to note is that those leaves are monsters compared to the new growth.  I'm wondering if the new green leaves will enlarge as much as the older leaves are or if I should be modifying my care of this plant.

April 2014:


In the photo below you can see that I am trying some cluster clippings and some leaf clippings.  Usually I find that cluster clippings (for plants in general) develop faster, so we'll see how these pan out.  It seems that with succulents you need to let them "dry out" or "callus over" before you try to get the new clippings to grow roots.  So here I have laid them out on a dry East-facing window sill to sit for a few days.


 Here is the post-pruning mama plant with some minimal new blooms:


I also decided now would be a good time to repot, mainly because I had just purchased some potting soil that is supposed to be good for succulents and cactuses.  You can see in the photo below that this plant has not become "root bound" in the pot, so I figure I will just try to remove as much of the soil from the rootball without damaging the root system, and repot into the same pot using some new cactus soil.


I have to post photos of the newly modified succulent cluster - I moved it outside onto my front door stoop, hopefully so it can get some more direct sunlight throughout the day, since my door faces South.  Although I do have some concern that going from 9 months in my climate-controlled house to every day in rising and lowering temperatures and humidity levels may be a bit too much of a shock for many of the new clippings to survive.  Perhaps tomorrow I will take some out and bring them back inside to use as a "control group."

Wednesday, May 14, 2014

Propagating African Violet

Since I was bummed that all my blooms shriveled off this plant (I'm still trying to figure out why, it could be a combo of improper moisture, improper humidity and improper sunlight... in other words I had no idea what I was doing), I decided to try to propagate it so at least I had something to be proud of!

From what I read, this can take a few months before you start to really see growth.  But here is what I read and the method I am following.

Take some clippings off of your African Violet, keeping about 1" of stem per leaf, as in the photo below.


Plant these clippings in African Violet potting soil, or whatever soil combo you come up with that is appropriate for these plants.  Then flood the pot making sure it is totally saturated.  Then cover the pot with a sealed plastic bag.  I used zip locks which I could almost close around the plants, but I figured a tiny opening at the bottom wouldn't impact the humidity-tightness of the environment.  The plant is theoretically able to sustain itself like this until it starts sprouting new growth in a couple months, so it's just autopilot here on out.  I'll post more pics of what this mini greenhouse looks like when I can get some photos during the day time.  Fingers crossed that it is as simple as it sounds!  And that my AV is sprouting some new blooms soon.  You can almost see them in the photo below.


EDIT:
I forgot to post photos of what the clippings looked like in their mini greenhouses.


Preparing a Succulent Cluster

Last weekend I finally got to the store to pick up some succulent potting soil.  I'd gotten some other soil recently but realized it was not really that great, plus succulent's need very drainable soil, something with sand in it.  Anyway, so I went around to my succulents and took some clippings that I'd already set over the bad soil and stuck them into individual pots in the new good soil.

For this little terrarium glass I got at the thrift store for 50 cents, I placed some stones in the bottom and set some of the succulent soil down on top.  I then planted a nice rosette from my echeveria plant.  This one already had some roots established, so I am hoping it grows nicely in this little bulbous home.


Here you can see my sedum plant has sprouted some new "branches."  I figured these would be good candidates to pluck off and attempt to propagate with.


I accidentally knocked that one petal off during this process, so I'm going to see if that thing roots as well.  This is all experimental!

I set the clippings above adjacent to a tray filled with stones and water, in which I have set all my succulent plants.  I find that with a lot of succulents, you are advised to let the clippings dry out for a couple days, then stick them in or near moist soil until they sprout roots.  By the weekend I should be in a position to stick these in potting soil.

Below you can see the whole arrangement with all the various succulents... and a baby orchid thrown in the mix.  This window faces East so they get pretty solid direct sunlight for about 5 hours.


Saturday, May 10, 2014

Checking in on the Aluminum Plant


A few weeks ago I moved my aluminum plant from a shelf next to an east-facing window down to the window's sill where it got some direct sunlight in the morning.  I moved it because I was a little concerned that it wasn't getting enough light as the new growth seemed to have stunted.  I don't know if it was coincidental timing or if the light actually helped, but in the past few days this thing seems to have really taken off!

April 2014:


May 2014:


Propagating Wandering Jew

Today I finally took my rooting cuttings of the wandering jew I recently incarnated into the next generation.  Here you can see the 50 or so cuttings I'd had soaking in a short vase of water, developing roots.


All but maybe 3 of them had a decent start to a root system.


And here is their new home:


 I planted them in 4 groups, bunching them up in my hand, boring a little hole and shoving them down in.  There's probably 14 or so in each group.  I have found that planting a whole mess together like this yields a much fuller and hearty looking plant.  I used to plant them stem by stem in a spread out configuration that led to leggy looking adult plants.


Since I was reusing potting soil, I added a scoop of vermiculite and pearlite, mixed it around a little bit with the soil and sprinkled maybe an inch on top of the pot of reused soil.  I read somewhere that it is good to reuse soil for new plants, new soil may "shock" them.  I also doused the new potting with a full flush of 15-30-15 fertilizer in rainwater.


I'll report back in a few weeks to let you know how many have taken root and how it's growing!

African Violet (Saintpaulias)

My understanding is that these plants are long-term bloomers, close in decoration value to an orchid.  I got this one already in bloom.  I originally had it in an east-facing room where it received perhaps an hour of direct sunlight from a west-facing window in an adjacent room.  It started to lose a lot of its blooms so I wasn't sure if this was from not enough sunlight or perhaps not enough watering.  So I took it out of that darker space and put it on a west-facing window sill.  There haven't been any new blooms but it seems to be doing well.  I think the plant likes humidity so I am trying to keep it pretty moist.

March 2014:


May 2014:


I have also read that if you get water on the leaves and don't wipe it off, it will create brown spots that never repair.  So far I seem to have kept all the water in the soil, though, admittedly I don't really take care when watering!

1.) Propagate: Divide during repotting or grown from leaf cuttings.
2.) Water: Keep soil moist but not soggy.
3.) Light: Moderate to bright indirect light.
4.) Fertilize:
5.) Soil:  

Rex Begonia

Though I have heard of them often before, I don't really know much about Begonias.  I bought this one because I liked the rich deep colors in the leaves.  I'm not sure if this will ever flower, but I'm hoping to keep it alive long enough to get it through a growth and dormant cycle, i.e. at least a year.

Here it is when it first joined the ranks end of March 2014:


Here it is today, May 10, 2014:


It looks like it has grown, but it could just be the angle.  One side has way more leaves than the other.  For example, this side looks less lush, right?


Anyway, some basic stats on this bad boy...

1.) Propagate: From leaf cuttings or dividing while repotting
2.) Water: Regularly, but do not over water.  They like humidity but not misting.
3.) Light: Bright indirect light.
4.) Fertilize:
5.) Soil: Light and fast-draining.

Monday, May 5, 2014

Braided Umbrella Tree (Schefflera Arboricola)

This was one of my earliest experiments in botanical babes.  I received it March 2012 and it was stowed in a room that received a lot of hot evening western sun.  It originally had three separate trunks and was very full, as you can see in the first photo.

March 2012:


I'm not sure if it was the heat or if it was the gnat-like bugs that accumulated in this warm room, but there was significant leaf drop.  It would happen to one trunk at a time.  The first trunk started dropping leaves, probably one cluster per day.  When no leaves were left, the trunk would turn black and ultimately it pulled out with barely even a tug!  When this started to happen to the second trunk, I hung some bug traps and caught almost all of the gnats, and moved the plant to a more climate-controlled room with comparable light.  It was too late to save the second trunk, but this maneuver managed to spare the third trunk.

March 2013:


After about a year I realized that the density of the foliage could only improve with additional trunks, as was the intent of the original clustering.  So I tried to propagate.  I had read that you can snip off a short segment from the top, stick it in rooting hormones and water, and roots will emerge after a week or two.  I waited over a month and still no roots emerged.  I ended up tossing the top clipping because it started to stink.

I had held off trying this technique because I worried this would stunt the original main trunk.  However, as you can see in the images below, a new trunk shoot has sprouted out near to where the old top had been clipped.

November 2013, before clipping:


November 2013, after clipping:


May 2014, new sprout growth:


Sunday, May 4, 2014

Sedum (Nussbaumerianum)

I do not have any investigation into this plant yet, but it seems to be growing well with my default method of plant care. I water it thoroughly about once a week in a similar style to the other succulents.

September 2013:


April 2014:


As you can see it seems to be growing! I put the terracota pot in this glazed one in lieu of keeping it on the stone covered tray.

EDIT

I have discovered that the scientific name for this plant is Nussbaumerianum.  It takes on copper tones, which at first I thought was a sign of getting too much sun!  I'm still not sure the proper way to care for this one.  However, my propagations seem to be doing swell.

Saturday, May 3, 2014

Aluminum Plant (Pilea cadierei)

I bought these plants probably because they were on sale and definitely because I needed something to fill a new little red container I had just acquired.  Also, I was at a point in my life when I needed something new and fun.  I had never heard of them before or seen them, to my recollection.  I potted them with generic potting soil along with this polka dot plant I got at the same time, September 2013.


While the polka dot plant took off, these two aluminums didn't do so hot.  After I repotted the polka dot plant in its own habitat, since it had gotten too large for this container, I moved the aluminums each to their own pots.


Shortly after this repotting in late fall early winter, I lost one - the leaves turned brown, shriveled and fell off until all I was left with was a stump.  The second lost some leaves in the same way, but I've managed to keep it alive.

April 2014 (you can see some browned tips on all the leaves, I can't figure out what this is from yet):


Here are some stats I found on this rascal.

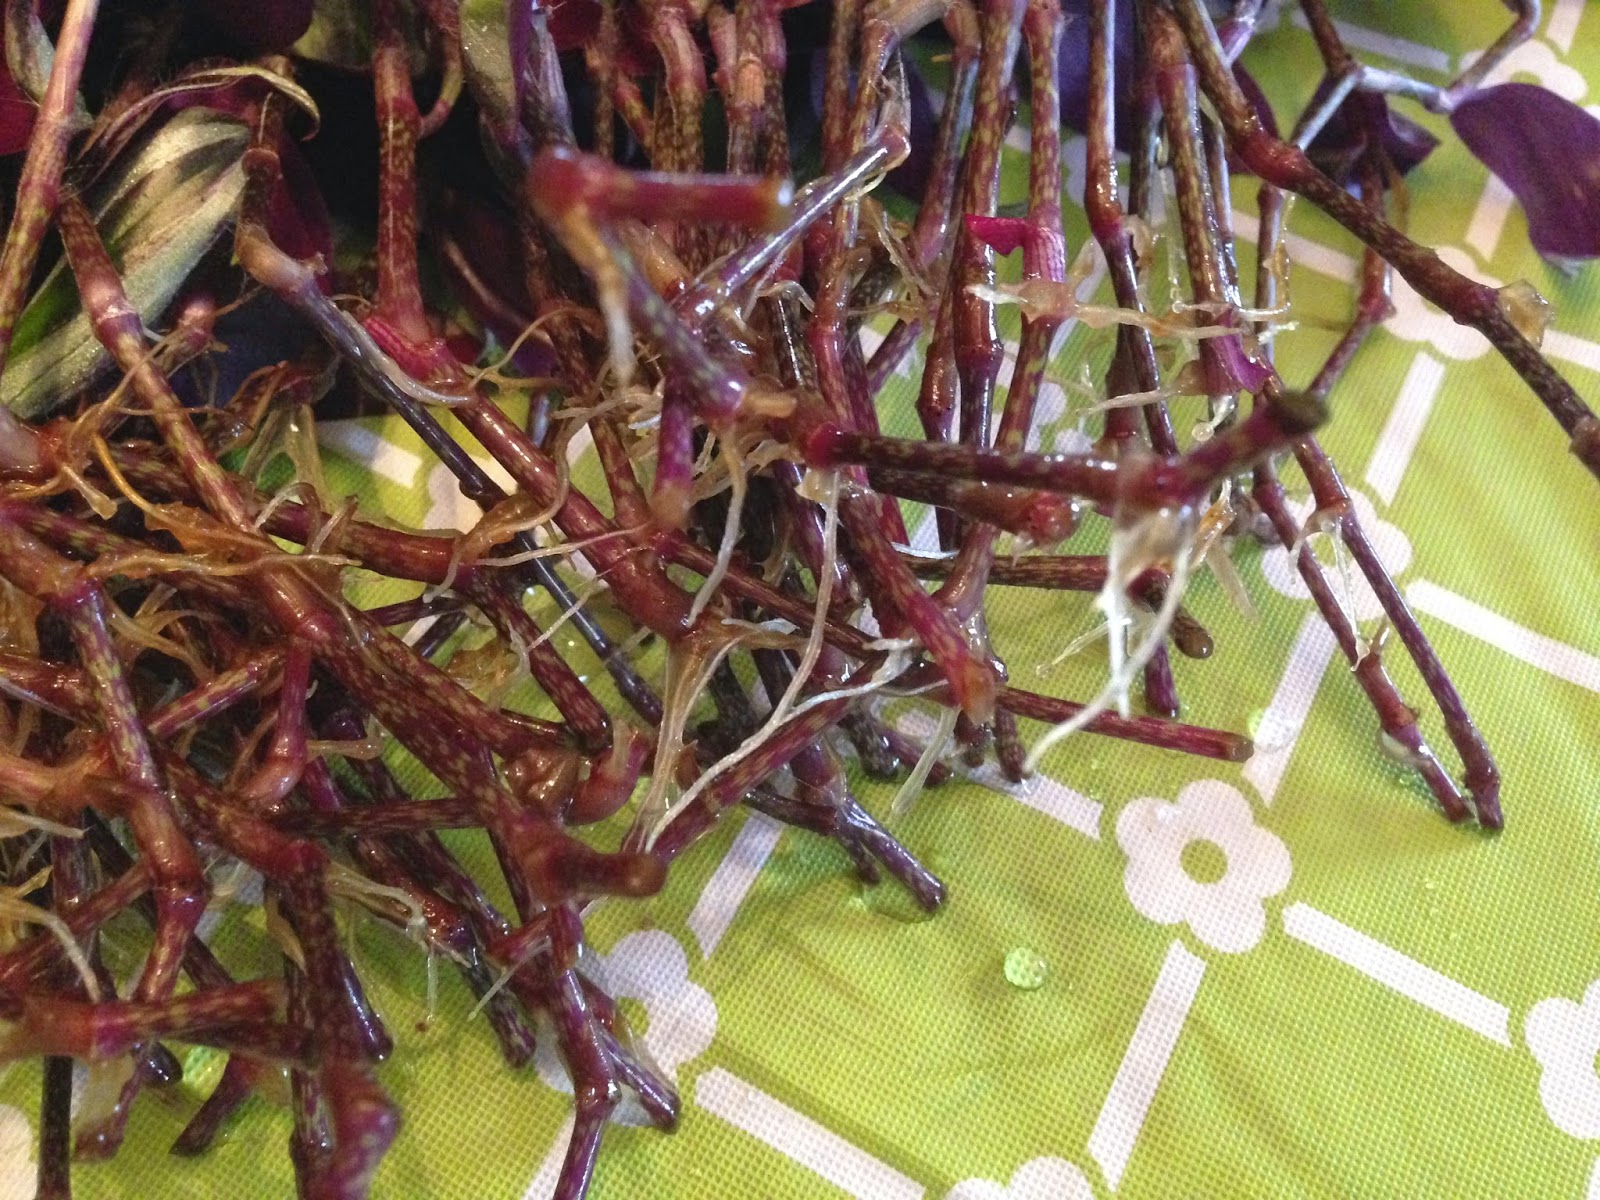
1.) Propagate: cuttings set in water until roots form.
2.) Water: keep moist during the growing season, let dry out during the winter months.
3.) Light: bright indirect light
4.) Fertilize: standard balanced fertilizer, every 2 weeks in the growing months
5.) Soil: sandy soil mixture