Sunday, June 28, 2015

Decapitation Propagation

My Moses in the Cradle was getting pretty mangy...  It kept growing taller and taller, leggier and leggier.  I wasn't sure how to slow it down, the taller it got the further apart its leaves came in as well.  I tried putting it in different light, watering it less, but no matter what, the situation continued.  It finally got so tall it just bent completely over.

Leaning up against the window jamb for support!

I remember when I first got the plant, doing some preliminary research, that it could be propagated by essentially decapitating, much like the Echeveria.  Seeing as it was no longer growing UP, I thought it an appropriate opportunity to give this a whirl.  I essentially cut it in half and ripped off a good length of leaves on the "head" to allow for rooting.  I think I even trimmed back some of the stem so it could properly fit below the soil line in its new pot.

The "head," minus unnecessary lower leaves.
Added some rooting hormone, for good measure.
Now ready for potting!
Potted head.

As for the original pot and plant, I just let it chill.

Beheaded!

Weeks later, the original pot and plant have sprouted many a new heads, and the "head" repot appears to be showing signs of new growth and rooting!

New purple heads!

The crooked stem is a result of this thing bending towards daylight,  and me spinning it to resist.

I suspect, much like the Echeveria, this will just be a vicious cycle.  I may need a more active approach in pruning this bad boy back much more regularly instead of letting it go like I did with the Echeveria (which eventually grew to be primarily stalk and pathetic little leaves).


Sunday, May 24, 2015

Baby Orchid (A Memoir)

Here are excerpts from my original "plant-tracking" journal entries:


9/19/2011
Repotted orchid into larger (8") clay pot with new soil (Hoffman's Special Orchid Mix - 52% pine bark, 40% Fir Bark, 8% Special Charcoal).

Here it is repotted in the Hoffman's Special Orchid Mix with 8" pot.


12/19/2011
Moved orchid to south-facing room with windows (my brother's old room).  It was advised by my coworker (who gave me the plant) that the leaves were too dark of green, thus it needed more light.  When I thought about it, compared to the new mature orchid's leaves, that is an accurate assessment.  (The mature orchid's leaves are lighter.)  I occasionally water baby orchid with a diluted Jack's Classic 30-10-10 fertilizer.


3/15/2012
My coworker advised that I clip the bloom spike to a vertical/plumb dowel, to redirect the spike.  (The spike started to grow around Thanksgiving, and was growing in the forward direction, same as the leaves).  At first, clipping the spike seemed to work, but soon the spike began to shrivel under the clip and it has since completely withered away - as opposed to the mature orchids spikes, which, post bloom, lost color and density, but retained their size and shape.  I plan to repot baby orchid back into its smaller dish and place it vertically so it stops this awkward growth pattern.  Hopefully the spike comes again next year and I will be ready for it.

4/1/2012
Not looking too well lately - leaves are looking very shriveled.  Moved it down to living room north window sill.

9/27/2012
I think it was down to one leaf and so finally I bought some of that spongy soil and repotted it into its original little pot (actually, I repotted into its old soil and pot first and the next morning that last leaf was fully turgid and erect, so I decided to buy more of that soil).  That was probably the end of April or beginning of May.  Now the orchid has 4 leaves again and tons of roots.  It even has a root grown over an inch out of the one drainage hole.  I may repot it soon, if the roots are finding their way out of the pot, that suggests to me that it needs a bigger pot.

11/26/2012
There are presently "5" leaves on this one, the 5th seeming to be stuck at some stunted length, and 2 others being shorter than leaf #1 and what is possibly leaf #3 or #4.  I was hoping it would spike again this year, but it seems the trauma it was subject to over the past year, between a botched spike and a near-death experience through transitioned soil, has preoccupied the babe's attentions.  There's always next year!

Here it is in the foreground September 2013 before it finally died.

The baby orchid never ended up blooming for me, so I don't know what type it may have been or even what color.  I suspect a bright, deep pink, though, as the undersides of the leaves were always a deep pink color.

Monday, May 18, 2015

Plant Rescue / New Babe!

A small memento/project for me after the passing of my grandmother was this small little guy.  Babci'd had several house plants, most of which had died as she grew unable to care for them or herself in the final weeks of her battle with cancer.

I would love to nurture this one back to health and illustrious growth as a living keepsake from my grandmother's home.

They had some dead shoots towards the base,
which I removed... for better or for worse?? 
At least they look all right for the moment!
I suspect the littler one on the left may have more luck!
I'm going to label this one as an aloe vera for now.  It appears to be some variation thereof, though it's a little less turgid than most aloes I have touched.

Wednesday, April 15, 2015

Spider Plant - Exposed!

A few weeks ago I was trying to do some cleaning without disturbing my plant arrangements, and instead I ended up bumping my armoire hardcore sending one of my baby spider plants rocketing at the floor.  The pot spewed wet soil everywhere and the spider plant was left semi exposed on my rug. (Pretty glad I chose a black and brown rug for the room - no visible stains!).  I probably caused some damage to the plant with this rather violent act, but on the plus side I got the opportunity to examine the root growth.  I had no idea these spider plants had a tubular like root system.  Check it out!


Monday, March 23, 2015

Gerber Re-Bloom!

I was about to can this gerber from last year, as 80% of the leaves had fallen off or gone yellowish/droopy.  I grabbed the pot from the window sill to start extracting the leaves when I noticed the tiniest little furry bud in the center of the leafy dried mass.  I figured, what would it hurt to leave it another month and see what happens?  Well, lo and behold!  A bloom emerges!!

March 23, 2015
Finally some new growth!

March 23, 2015
A big ol' bloom!

March 1, 2015
Hardly any new growth in months.

March 1, 2015
The tiniest bud in the center!
The little ones have not shown signs of blooming quite yet, they are still relatively small.  This larger one I had purchased last year in mid-April, I believe.  I will be very pleased if I can get another spring and summer of blooms from this plant!

Sunday, March 15, 2015

Palm, Repotted

My palm has been doing really well over the past two years.  It continues to sprout up new leaves taller and longer than those preceding.  I did notice, however, a couple weeks ago a number of leaves turning brown in one particular shoot.  This weekend I finally had a chance to repot the palm, something I was planning to do in a month or two, but this new dying shoot pushed it up on the priority list.

The leaves I am tugging on here are all attached to the same shoot.
They all dried out and turned brown.

The leaves pointing to the bottom of the photo are all dead.
I didn't have any seemingly appropriately sized pots to step up into, so I went to Home Depot and bought this monster pot.
Decidedly way too big.

When I was at Home Depot, I noticed all the huge palms in the store were in tiny little plastic pots, which really only had a few inches between the shoots and the edge of the pot.  Granted, they are grown like this in the most ideal conditions, but still, it festered in my mind.  I bought the huge pot and went home to prep it for the palm.

For the first time I actually measured the
depth of the stone layer I put at the bottom!
I laid in some soil on top of the stones and got ready
to set the palm and its root ball into the new pot.


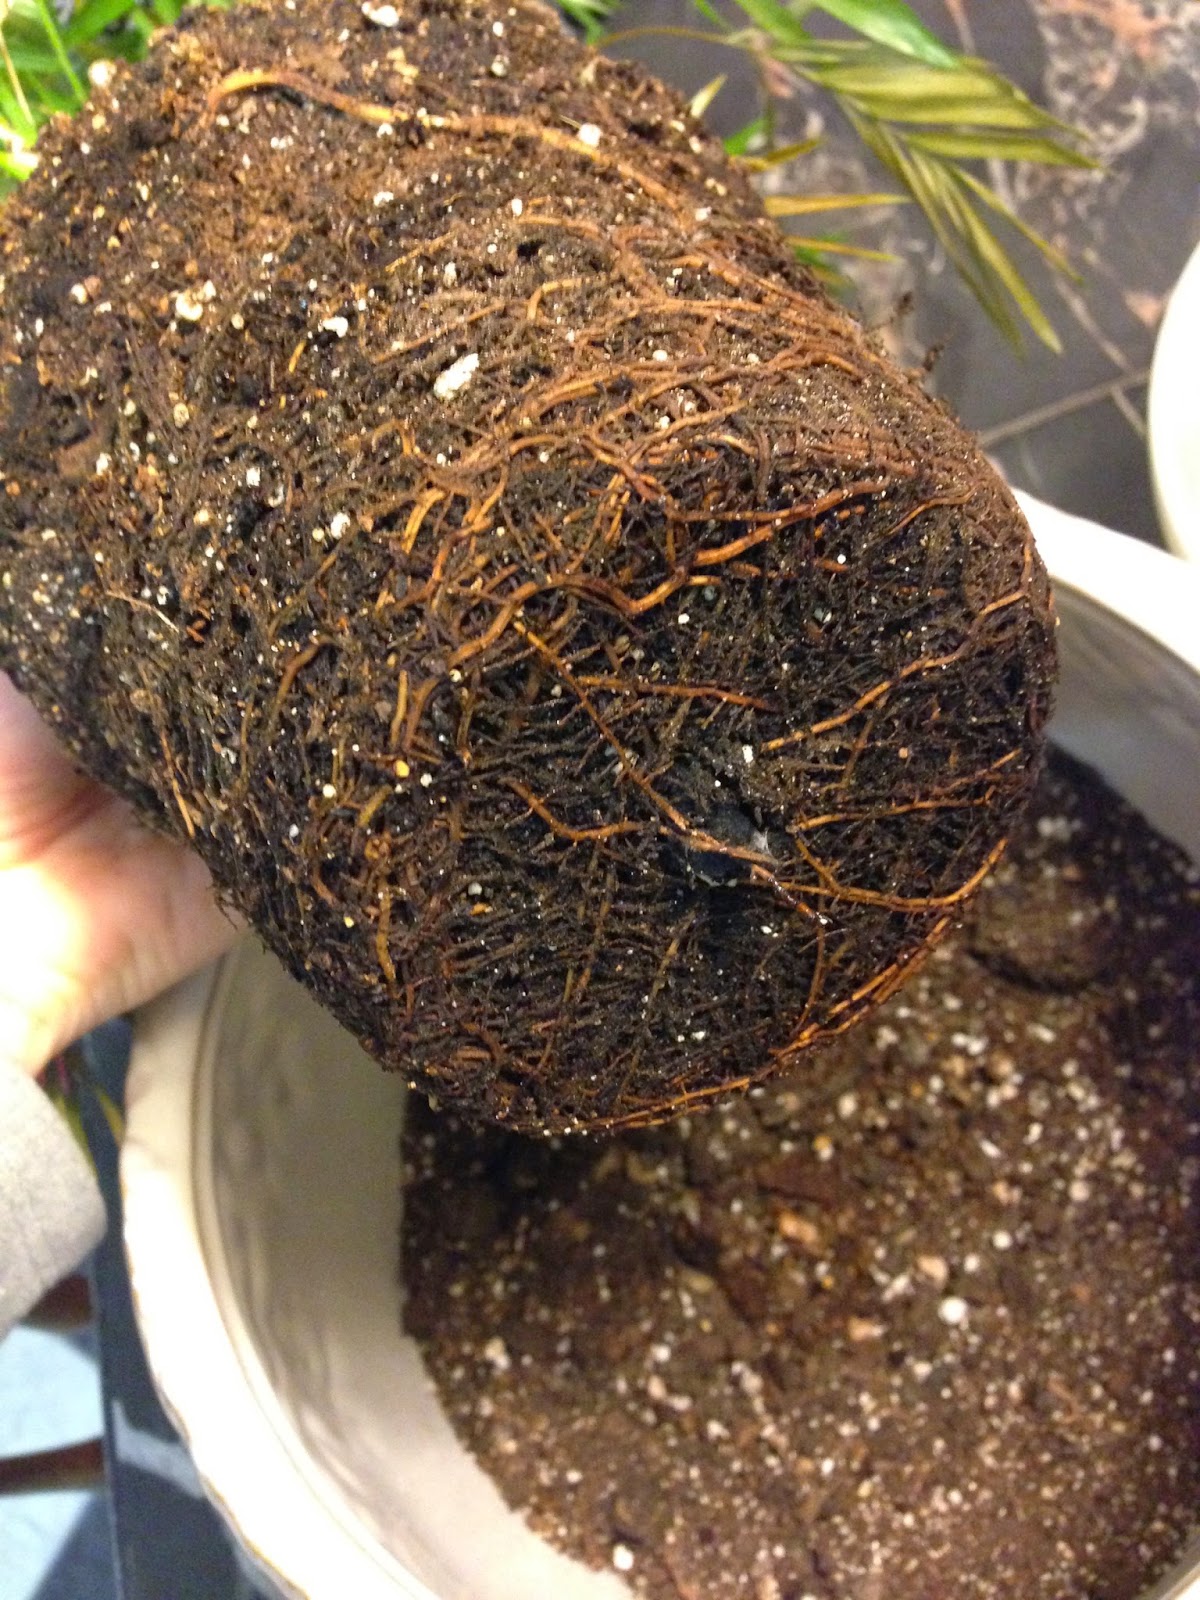
Pausing for a moment, I decide that the palm is not really all that root bound, given how tall and full it is.  I was expecting way more root visibility than this, particularly when you compare it to my polka dot plants, which are way smaller and less dense.  I ultimately decided that this pot was way too big, and I ended up planting it in a kitchen utensil storage container.  I do not have the photo, but will post it another time when I'm doing my annual check up on this plant.  Below are the rest of the photos I took during this exercise.


A Word on Water

In an ideal world I would have a limitless supply of readily accessible rainwater to use for my indoor houseplants.  However, I can't always rely on a steady supply of this (though I have coerced my father into gathering the rainwater that collects from a little plastic-roofed shed I built at my parents' house).  There can be droughts, lack of collection, and other things that could impact my flow.

When I start running low on my bottled rainwater, I ration it off to the plants that are most requiring of it.  The orchids and the African violets are the plants I try to always feed with rainwater.  The other plants will be all right with the tap water.

If I am watering with tap water, I try to incorporate the smallest ration of fertilizer specified on the container.  I like to use Jack's Classic Water Soluble Plant Food, in the generic proportion of 15-30-15.  For my orchids, I use the orchid proportion, which is 30-10-10.  African violets are the only plants for which I currently do not use any fertilizer.

We received a steady amount of snow this winter, and I am kicking myself for not acting on this earlier.  In the last blasting of snow, I decided to scoop up a big tub of it and let it melt into sweet precious plant water.

My two tubs from the last snow fall.  This yielded over 6 gallons!
If I had done this every day, I could have melted weeks and weeks of rainwater stock!  Part of the problem was trying to find containers to scoop the snow into (I have a lot of things in storage right now!), and trying to find galloon jugs in which to store the water long term.

The few gallons I was able to get (more like half dozen or so), I decided to sprinkle in some of my fertilizer, just to make it a super deluxe natural and enhanced feeding for my plants, as they enter the growing season.

The jug on the left is with 1/8 teaspoon of the fertilizer.
It looks distinctly blue, which is rather unusual,
perhaps I actually added more than 1/8?